Classic

100+ Meals | No Pausing Videos | AutoGrocery Lists
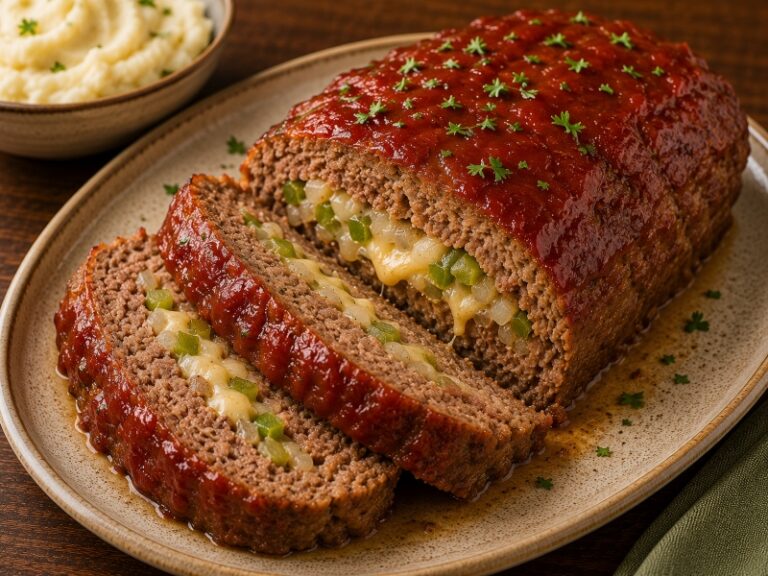
Ground beef meatloaf rolled with cheese, onions, and peppers then baked until tender.

Add this recipe
to your
Grocery Plan
in one click!

1. Preheat oven to 375°F. Lightly grease a baking dish. 2. In a large bowl, combine ground beef, egg, onion powder, garlic powder, salt, black pepper, and a few tablespoons of ketchup. Mix gently until just combined. Do not overwork the meat. 3. Lay a large sheet of parchment paper on the counter. Spread the meat mixture into an even rectangle about ½ inch thick. 4. Evenly distribute finely chopped onion, green peppers, and shredded cheese over the surface of the meat, leaving a small border around the edges. 5. Starting from one long side, use the parchment paper to help roll the meat tightly into a log, keeping the filling inside. 6. Slice additional onion and spread it evenly across the bottom of the baking dish. 7. Carefully transfer the rolled meatloaf seam-side down onto the bed of onions. 8. Drizzle ketchup evenly over the top. Add any vegetables or cheese that fell out around the loaf. 9. Bake 45–60 minutes until internal temperature reaches 160°F in the center. 10. Remove from oven and let rest 10 minutes before slicing to allow juices to redistribute.
  • ground beef

  • egg

  • onion

  • ketchup

  • salt

  • black pepper

  • green peppers

  • onion powder

Prep
Cook
Total
Serves6
DinnerAmerican
View the full recipe page
Creamy roasted vegetable soup paired with a crispy gluten-free grilled cheese sandwich.

Add this recipe
to your
Grocery Plan
in one click!

1. Preheat oven to 400°F. Line a large baking sheet with parchment. Spread prepared vegetables in an even layer. Drizzle with olive oil and season generously with salt and pepper. Toss to coat. 2. Roast for 25–35 minutes, stirring once halfway through, until vegetables are tender and lightly caramelized at the edges. 3. Transfer roasted vegetables to a large pot. Add enough homemade vegetable broth to cover by about 1 inch. 4. Bring to a gentle simmer over medium heat and cook 10–15 minutes to allow flavors to blend. 5. Using an immersion blender (or working carefully in batches with a standard blender), blend until smooth and creamy. Adjust thickness with additional broth if needed. Taste and adjust salt and pepper. 6. For the grilled cheese, heat a skillet over medium. Butter one side of each slice of bread. 7. Place one slice of bread butter-side down in the skillet. Add cheese evenly, then top with second slice butter-side up. 8. Cook 3–4 minutes per side until golden brown and crisp, pressing lightly with a spatula. Cheese should be fully melted. 9. Let rest 1–2 minutes before slicing. Serve alongside hot soup.
  • onions

  • garlic

  • tomatoes

  • gluten-free bread

  • butter

  • gluten-free bread

  • cheddar cheese

  • butternut squash

  • bell peppers

Prep
Cook
Total
Serves4
SoupAmerican
View the full recipe page
Potato skins filled with cheese, bacon, and creamy mashed potatoes then baked until golden.

Add this recipe
to your
Grocery Plan
in one click!

1. Preheat oven to 400°F. Line a baking sheet with parchment paper. 2. Scrub the russet potatoes dry. Rub each one lightly with olive oil and sprinkle generously with salt. Place directly on the prepared baking sheet. 3. Bake for 50–60 minutes, until the skins are crisp and a knife slides easily into the center. Internal temperature should reach at least 205°F for a fluffy interior. 4. While the potatoes bake, cook the bacon in a skillet over medium heat until crisp, about 8–10 minutes. Transfer to a paper towel–lined plate and crumble once cooled. 5. Remove potatoes from the oven and let cool for about 10 minutes, just until safe to handle. Keep the oven on. 6. Slice each potato in half lengthwise. Carefully scoop the interior into a large bowl, leaving about ¼ inch of potato attached to the skin so the shells hold their shape. 7. Add butter, sour cream, milk, salt, and pepper to the scooped potato. Mash until smooth and creamy, with a slight texture remaining. 8. Stir in most of the crumbled bacon and shredded cheddar cheese, reserving a small portion of each for topping. Taste and adjust seasoning if needed. 9. Spoon the filling evenly back into the potato shells, mounding slightly. 10. Return to the oven and bake for 15–20 minutes at 400°F, until heated through. 11. Switch the oven to broil. Sprinkle reserved cheddar and bacon over the tops. Broil for 2–4 minutes, watching closely, until the cheese is melted and lightly golden. 12. Remove from the oven and let rest for 5 minutes before serving to allow the filling to set.
  • russet potatoes

  • sour cream

  • bacon

  • butter

  • milk

  • cheddar cheese

  • olive oil

  • salt and pepper

Prep
Cook
Total
Serves4
DinnerAmerican
View the full recipe page
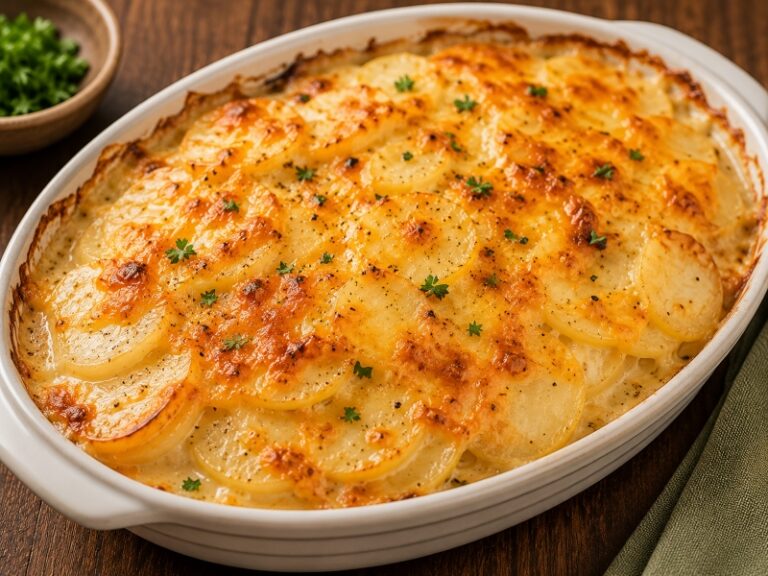
Creamy layers of potatoes and cheddar cheese baked until golden and bubbly.

Add this recipe
to your
Grocery Plan
in one click!

1. Preheat oven to 375°F. Lightly grease a baking dish with butter. 2. Wash and peel potatoes if desired. Slice thinly and evenly, about 1/8 inch thick for even cooking. 3. In a saucepan over medium-low heat, warm heavy cream and milk together for 3–5 minutes. Do not boil. 4. Arrange a layer of sliced potatoes in the baking dish, slightly overlapping. Pour a small amount of the warm cream mixture over the layer and sprinkle with shredded cheddar cheese. 5. Repeat layering potatoes, cream mixture, and cheddar until all ingredients are used, finishing with cheese on top. 6. Cover loosely with foil and bake for 45 minutes. 7. Remove foil and continue baking 20–30 minutes until the top is golden brown and potatoes are fork-tender. Internal temperature should reach about 200°F for fully tender potatoes. 8. Let rest 10–15 minutes before serving to allow the sauce to thicken and set.
  • potatoes

  • heavy cream

  • milk

  • cheddar cheese

  • butter

  • breadcrumbs

  • salt

  • black pepper

Prep
Cook
Total
Serves6
DinnerAmerican
View the full recipe page
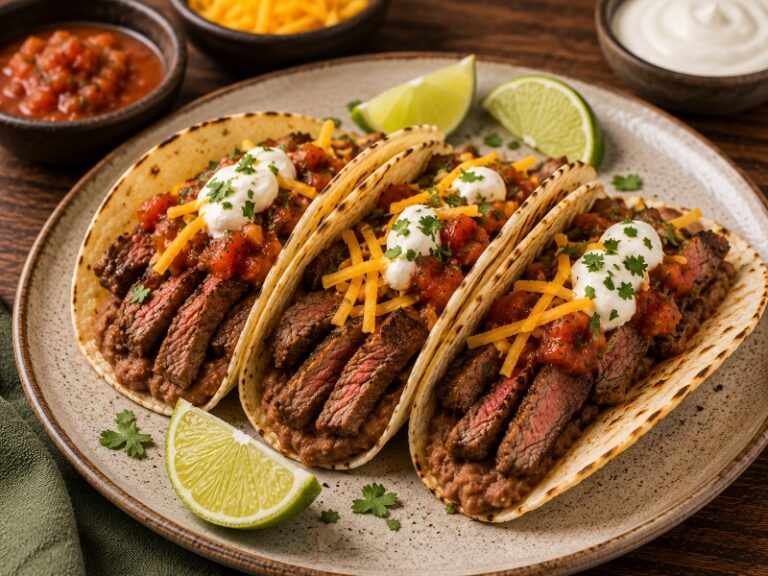
Sliced steak tacos loaded with cheese, salsa, sour cream, and warm tortillas.

Add this recipe
to your
Grocery Plan
in one click!

1. Remove the outside round steak from the refrigerator 15–20 minutes before cooking. Pat dry with paper towel and season both sides generously with salt and pepper. 2. Heat a large skillet over medium-high heat until very hot. Add a light drizzle of oil and allow it to shimmer. 3. Place the steak in the hot skillet and sear 3–4 minutes without moving it, until a deep brown crust forms. 4. Flip and cook an additional 3–4 minutes for medium doneness. Adjust time slightly depending on thickness. Cook until internal temperature reaches 135–140°F for medium. 5. Remove steak from the skillet and let rest 5–10 minutes to allow juices to redistribute. 6. While the steak rests, warm tortillas in a dry skillet over medium heat for 30–45 seconds per side until soft and pliable. 7. Slice the rested steak thinly against the grain into strips. 8. Assemble tacos with sliced steak, salsa, sour cream, and any additional toppings. Serve immediately while warm.
  • salsa

  • sour cream

  • outside round steak

  • cheddar cheese

  • GF tortilla shells

  • GF tortilla chips

  • refried beans

  • ground beef

Prep
Cook
Total
Serves4
DinnerMexican
View the full recipe page
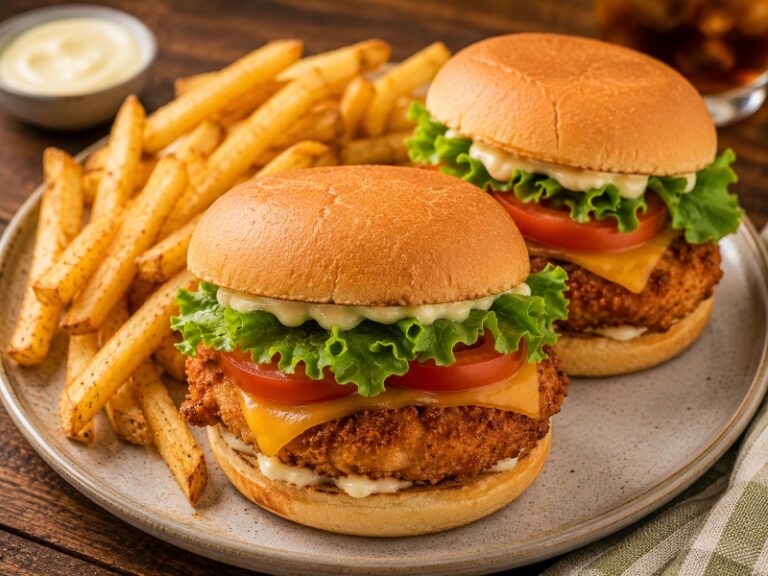
Crispy chicken burgers on gluten-free buns served with golden french fries.

Add this recipe
to your
Grocery Plan
in one click!

1. Heat olive oil in a deep skillet or heavy pot to 350°F. Use a thermometer to keep the temperature steady. 2. Carefully lower the pre-cooked gluten-free chicken burgers into the hot oil in small batches. Fry 3–4 minutes, turning once, until golden brown and heated through. 3. Chicken burgers should reach an internal temperature of 165°F. The exterior should be crisp and evenly browned. 4. Remove chicken burgers and transfer to a paper towel–lined tray. Let rest 2–3 minutes. 5. Return oil to 350°F if needed. 6. Add french fries in small batches. Fry 4–6 minutes, until deeply golden and extra crisp. For a firmer texture, allow them to cook slightly longer until dark golden at the edges. 7. Remove fries with a slotted spoon and transfer to a paper towel–lined tray. Season immediately with salt while hot. 8. Lightly warm gluten-free buns if desired. 9. Assemble burgers by spreading mayo on the bun, adding lettuce, sliced tomatoes, and the crispy chicken burger. 10. Serve immediately with the hot olive oil–fried french fries.
  • buns

  • gluten-free buns

  • pre-cooked GF chicken burgers

  • lettuce

  • mayo

  • tomatoes

  • cheese

Prep
Cook
Total
Serves4
DinnerAmerican
View the full recipe page

Add this recipe
to your
Grocery Plan
in one click!

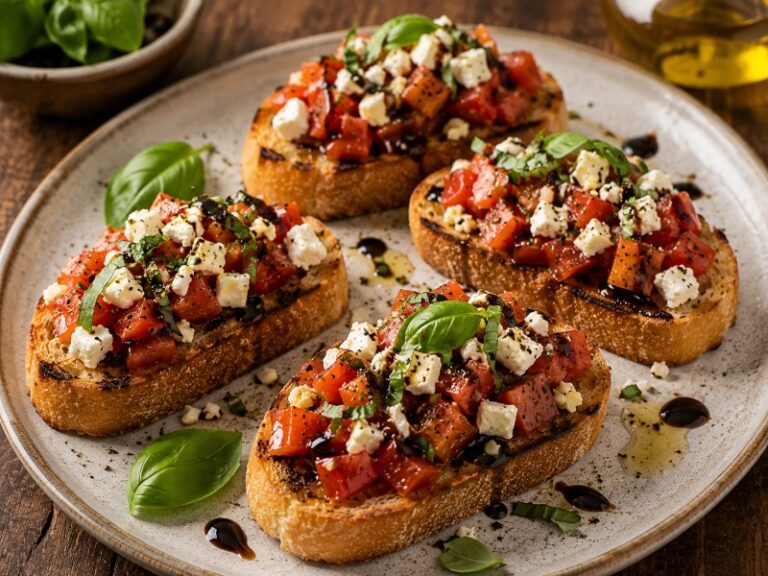
.1. Preheat oven to 400°F. 2. Slice sourdough bread into ½–¾ inch thick pieces. Arrange in a single layer on a baking sheet. 3. Brush both sides lightly with olive oil. Bake 8–12 minutes, flipping halfway through, until golden and crisp at the edges. 4. While the bread toasts, dice fresh tomatoes and place them in a bowl. If very juicy, gently drain excess liquid. 5. Add minced garlic, chopped fresh basil, olive oil, a small splash of balsamic vinegar, salt, and crumbled feta cheese. 6. Stir gently to combine. Let sit 5–10 minutes so flavors blend. 7. Remove toasted sourdough from the oven and let cool slightly so it stays crisp when topped. 8. Spoon the tomato and feta mixture generously over each slice just before serving. 9. Serve immediately while the bread is crisp and the topping is fresh.
  • tomatoes

  • basil

  • garlic

  • olive oil

  • balsamic vinegar

  • salt

  • sour dough bread

  • feta

Prep
Cook
Total
Serves4
AppetizerItalian
View the full recipe page
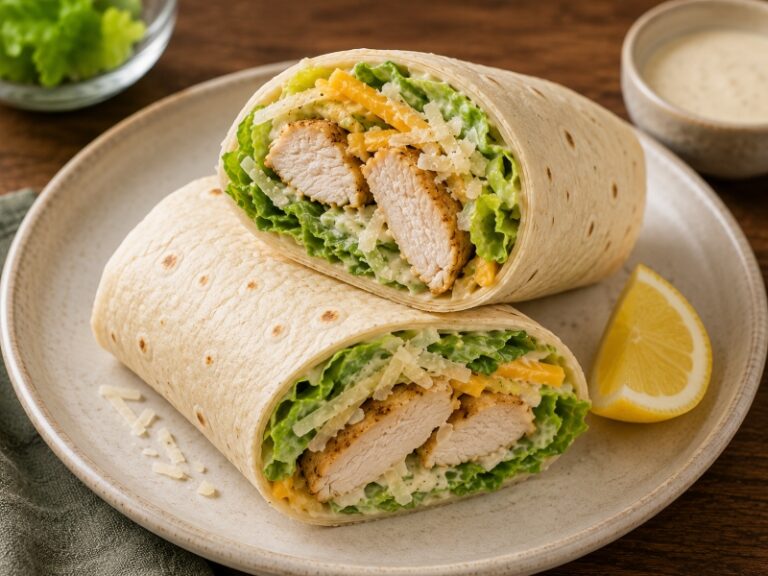
Seasoned chicken, Caesar salad, and cheese wrapped in a soft gluten-free tortilla.

Add this recipe
to your
Grocery Plan
in one click!

1. Cut chicken breasts into small bite-sized pieces so they cook quickly and evenly. 2. Heat a skillet over medium-high heat. Add butter or olive oil and allow it to melt and heat until shimmering. 3. Add chopped chicken in a single layer. Season with salt, pepper, and minced garlic. 4. Cook 4–6 minutes, stirring occasionally, until the chicken is lightly golden and cooked through. Pieces should feel firm and reach an internal temperature of 165°F. Slight browning helps keep the texture a bit drier. 5. Remove from heat and let rest 2–3 minutes. 6. In a bowl, toss chopped romaine lettuce with Caesar dressing and grated parmesan cheese. 7. Lay flour tortillas flat. Sprinkle a small amount of cheddar cheese down the center. 8. Add the cooked chicken over the cheddar, then top with the dressed romaine. 9. Fold in the sides and roll tightly from the bottom up to form a soft wrap. 10. Serve immediately while the tortilla is soft and the filling is warm.
  • chicken breast

  • romaine lettuce

  • caesar dressing

  • parmesan cheese

  • gluten-free tortillas

  • cheddar cheese

Prep
Cook
Total
Serves4
LunchAmerican
View the full recipe page
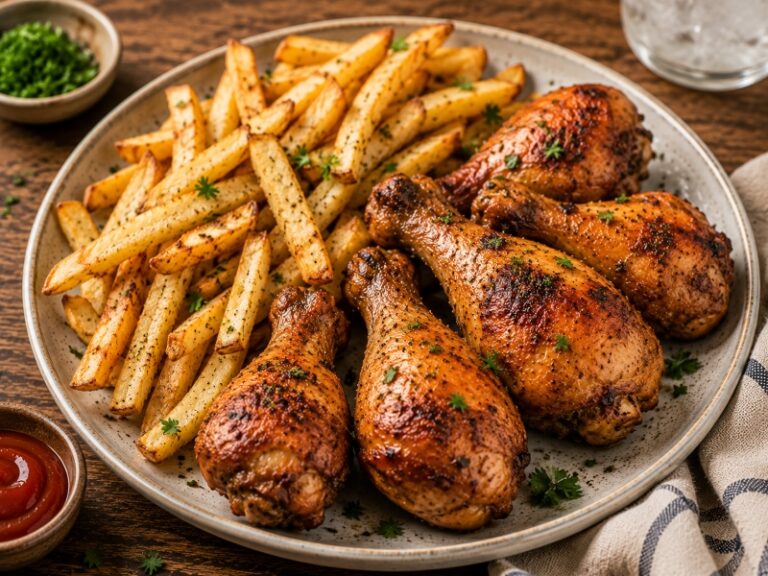
Roasted chicken drumsticks paired with crispy golden french fries.

Add this recipe
to your
Grocery Plan
in one click!

1. Pat drumsticks dry with paper towel. Place in a large bowl, drizzle with olive oil, and toss to coat evenly. 2. Season generously on all sides with your preferred seasoning blend, plus salt and pepper if needed. 3. Preheat oven to 425°F. Line a baking sheet with parchment paper and arrange drumsticks with space between each piece. 4. Bake for 35–45 minutes, turning halfway through, until the skin is deeply golden and crisp. 5. Continue cooking until drumsticks reach an internal temperature of 165°F at the thickest part near the bone. For extra crisp skin, bake closer to 45 minutes. 6. While the drumsticks bake, heat olive oil in a deep skillet or heavy pot to 350°F. Use enough oil for fries to float and cook evenly. 7. Carefully add french fries in small batches. Fry 4–6 minutes, until dark golden and extra crisp. For your preferred overcooked texture, allow them to go slightly deeper golden with firm edges. 8. Remove fries with a slotted spoon and transfer to a paper towel–lined tray. Season immediately with salt and pepper while hot. 9. Let drumsticks rest 5 minutes before serving so juices settle. Serve hot with the crispy olive oil–fried fries.
  • drumsticks

  • seasoning

  • frozen french fries

Prep
Cook
Total
Serves4
DinnerAmerican
View the full recipe page
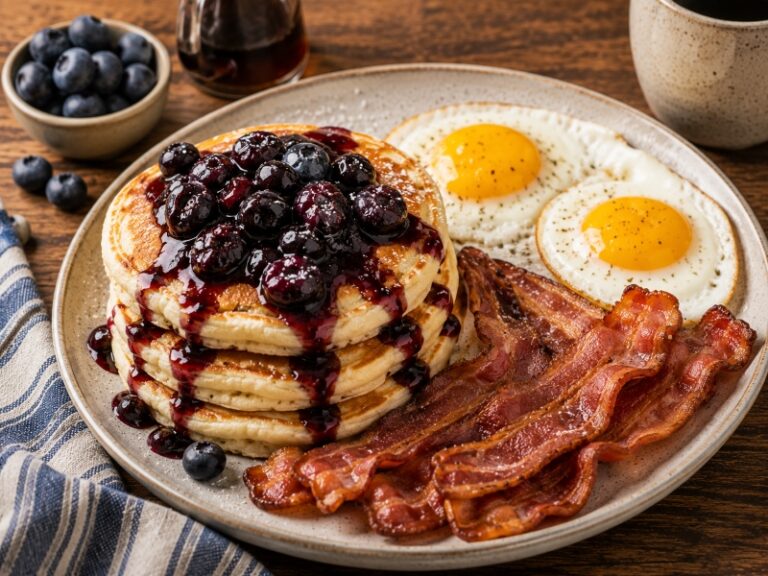
Fluffy pancakes with blueberry sauce served alongside bacon and eggs.

Add this recipe
to your
Grocery Plan
in one click!

1. Preheat oven to 400°F. Line a baking sheet with parchment paper and arrange bacon in a single layer. 2. Bake bacon for 15–20 minutes, depending on thickness, until it reaches your family’s preferred crispness. The fat should be rendered and the edges deep golden. Transfer to a paper towel–lined plate to drain. 3. While the bacon cooks, prepare the gluten-free pancake mix according to package directions, adding the required eggs as instructed. Stir just until combined; do not overmix. 4. Heat a skillet or griddle over medium heat. Add a small amount of butter and let it melt and lightly foam. 5. Pour pancake batter onto the hot surface. Cook 2–3 minutes, until bubbles form on the surface and the edges look set. 6. Flip and cook another 1–2 minutes, until golden brown and cooked through. The center should feel springy when lightly pressed. Repeat with remaining batter, adding more butter as needed. 7. In a small saucepan over medium heat, combine frozen blueberries and a drizzle of honey. Cook 3–5 minutes until berries release their juices and begin to simmer. 8. In a small bowl, mix cornstarch with a splash of water to create a slurry. Stir into the simmering berries and cook 1–2 minutes until the sauce thickens and coats the back of a spoon. Remove from heat. 9. Stack pancakes, spoon warm blueberry sauce over top, and serve with maple syrup and bacon on the side.
  • gluten free pancake mix - pc brand

  • blueberries- frozen is fine

  • maple syrup

  • bacon

  • honey

  • corn starch

  • butter

  • eggs

Prep
Cook
Total
Serves4
BreakfastAmerican
View the full recipe page

What is a classic meal?

Classic meals are family-friendly recipes without specific dietary restrictions. They are designed to keep meal planning simple while offering a wide variety of everyday dinner options.
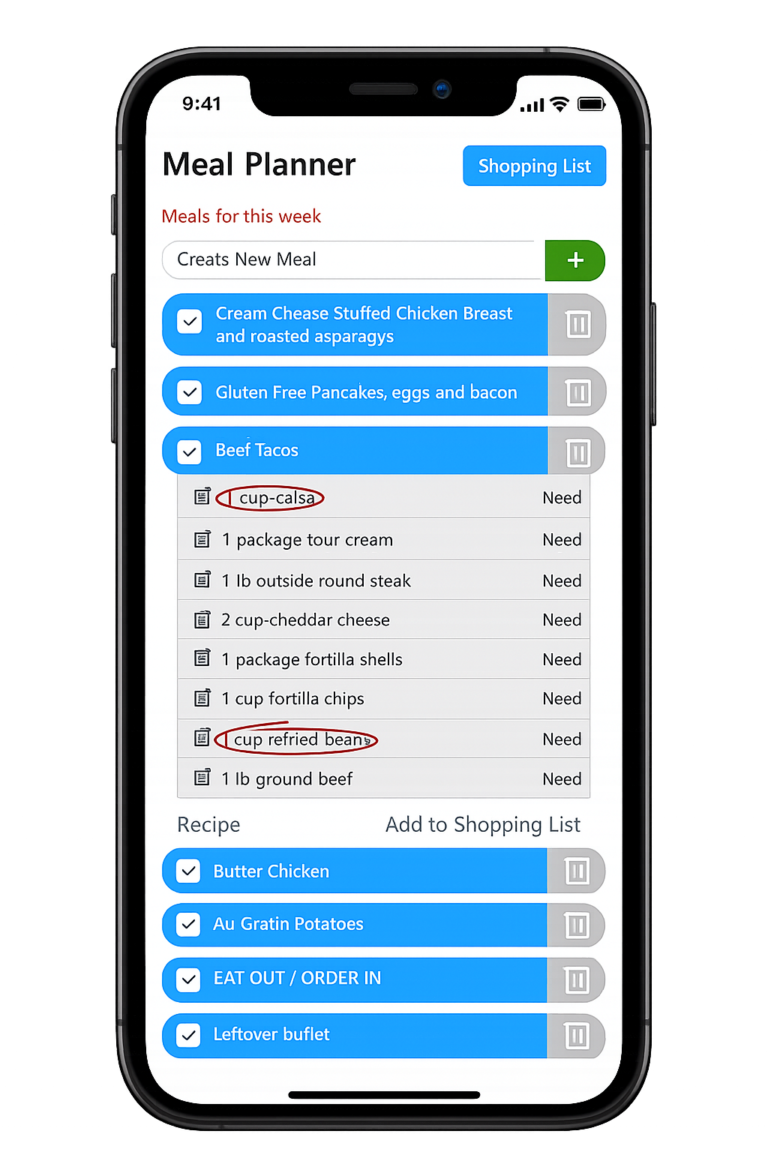
MyGroceryPlan meal planner app displayed on a smartphone showing weekly meals and ingredient list for grocery planning

Plan These Meals in Seconds

Instead of saving recipes and writing grocery lists later, you can add meals directly to your weekly plan.